Photoshop Actions | Cloning, Healing and Patching, Oh My! | Fixing Undereye Circles, Blemishes and More Tutorial

The Clone Tool:
It takes pixels from one part of your image (that you select by clicking while holding down the option key with the clone stamp active) and copies them to another part of your image that you select. You can choose your opacity of the brush as well as the hardness. The “Aligned” option is selected by default in your options bar, which makes the source point (where it’s copying from) follow your brush, so each new stroke you make copies the image starting where you made the first stroke. If you deselect Aligned, each time you release your mouse (pen, trackpad, etc) it starts the sample/source point back to the original location you selected. It is simply copying pixels from one area of the image to the other, so no blending is done for you.
The Patch Tool (found in Photoshop and above):
A bit more intelligent than the clone tool. You select the area you want to fix or change, then drag to a source location to copy those pixels. Photoshop will blend the source location with your destination area trying to match the texture and lighting of the area you are correcting. The method I prefer to use with the patch tool is to first make sure that Source mode is selected in the options bar. Then select the patch tool from your tool bar, select as you would with the lasso tool the area you want to repair, then drag the selection to the area you want to replace the damaged area with (the “good pixels”).
The Healing Brush:
This tool works very similarly to the clone tool, choosing a source area and then painting on where you want it fixed, except it also tries to match the texture and tonal values of the source area and blends the two together. It works best with small fixes like blemishes, scratches, wrinkles and dust.
The Spot Healing Brush:
Works just like the healing brush except you don’t select a source area. Simply paint on the area you want to repair and Photoshop will guess at the best source area nearby, automatically healing the area. It’s really quick and easy and is best used for tiny fixes like dust and blemishes. It doesn’t always work flawlessly, sometimes choosing the wrong area as the source – in that case, move on to the healing brush so you can tell Photoshop where the good pixels are you want to sample from.
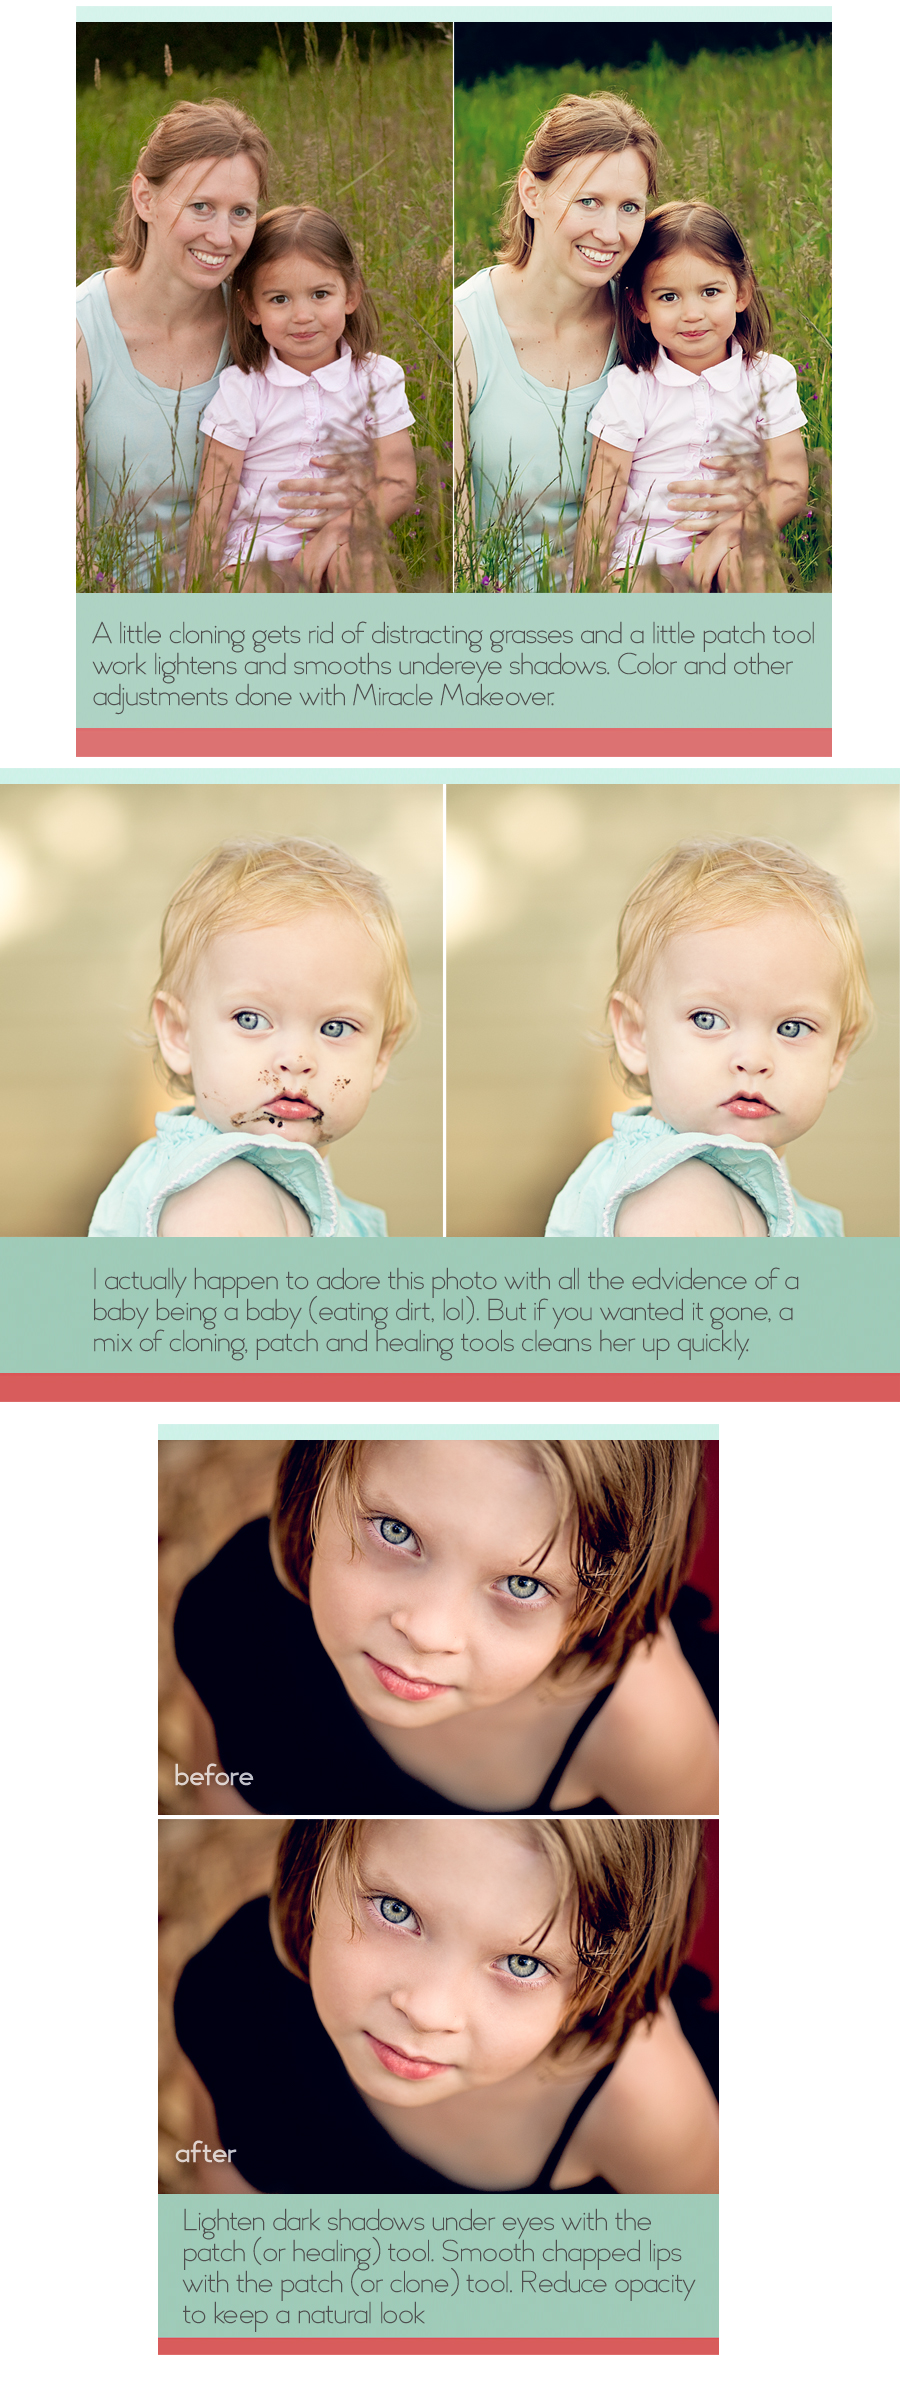
A few quick samples of easy fixes using the various clone/healing/patch tools:

And watching the tools in action in both Elements and Photoshop can really help understand how they work and how they can benefit your workflow, ending with a more polished final image. Note that the color is wonky on the videos for some reason!


This is so helpful! Which version of photoshop do you use?
I had not used the patch tool yet so thank you for this video!
I’ve never used the patch tool before either so this was a great tutorial! I also must admit I don’t usually use layers when fixing an image. In the future I’ll definitely start!
Thank you : )
Annie, these are excellent tips. I remember finding the spot heal and cloning tool for the first time. It was magical; changed my world forever!
Oh my! I have just stumbled onto your blog FANTASTIC!!! Just watched the videos, I’ve played with the tools before but not really understanding them. Thank you so much for the time you’ve taken to put that together, so generous of you.
I learn so much from you, Thank you