Another Step by Step Feature | Photoshop Actions Photo Tutorials

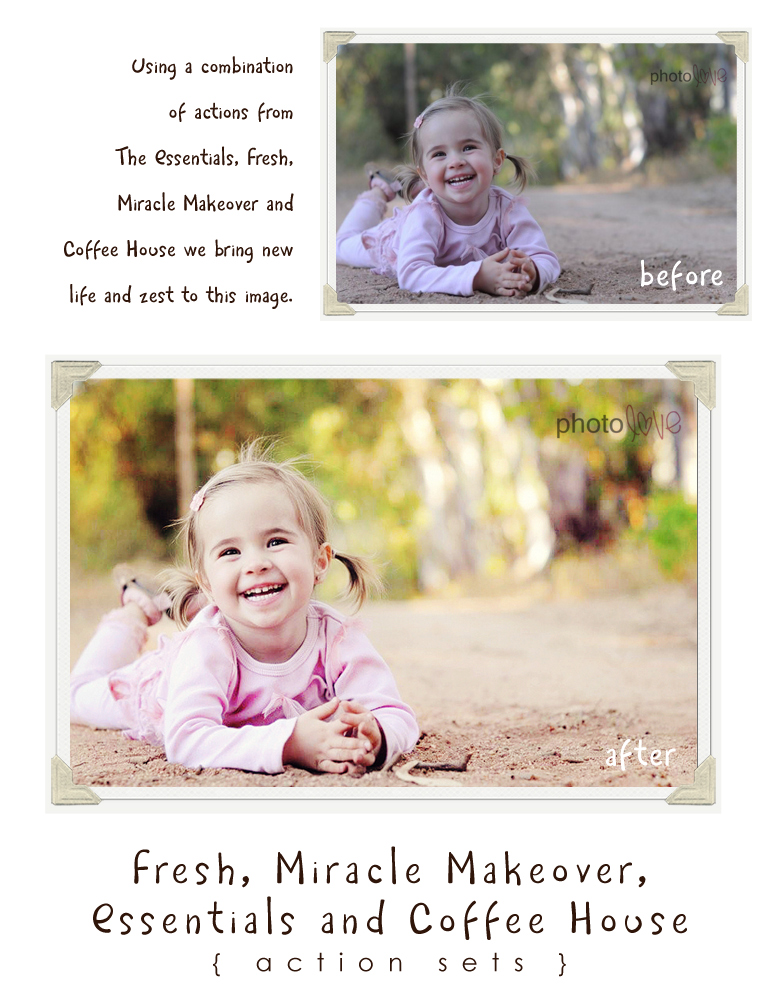
The first thing I always correct in my images is the exposure and color. I’ll start this image edit by brightening things up using Turn Up the Lights from my retired Fresh action set.
Next, we’ll take care of the color issues. This photo is very cool in tone, so I’ll run the Get Rid of the Wonky Colors from my Miracle Makeover action set. I leave on the Contrast Boost and Tone layers and then turn on the Get Rid of the Cyan and adjust the opacity level to 38% and the Get Rid of the Blue layer at 25%. This color correction step is no doubt the most dramatic edit made in this image … getting your color properly adjusted is a must for beautiful photos. A bad color cast can ruin the best of photos.
I want to bring out some of the natural colors in the trees behind her, so I use the Paint On Vivid Color action from The Essentials action set. I adjust the opacity down to 45% and paint pretty much everywhere except her skin and hair. This is a fabulous action to bring out really bold colors in your images.
To add a crisp look to the image I’ll next run my Get Some Clarity action from The Essentials set and adjust opacity down to 22%.
Next, I’ll apply the Pro Edge Vignette from The Essentials set and adjust to 23%. One thing I like to do with my vignette layer is take a ver large, soft white brush and paint around the edges to kind of “mess it up” a bit … so you’re left with a vignette that isn’t perfectly symmetrical and looks more natural. To tone down the highlights I’ll use the Recover Highlights action from The Essentials at 12% opacity.
Now that my “clean edit” is finished I’ll choose an “artistic action” to add some extra sparkle. I used Almond Milk Tea here from the retired Coffee House action set at 35% opacity.
I finish the processing off by using Sharpen for Web from The Essentials action set.
Note about the actions used here: The Essentials and Miracle Makeover sets now come in a money saving bundle for those who want both sets.
Thanks to Charla from Photo Love for the darling photo.
![]()

Wow….I’m so in love with your after photo and I have to tell you that I just saw Angela Brown’s photo that she used the Essentials action on and it is just as fabulous! These actions look fantastic and are already on my wish list! 🙂 Thank you for the wonderful tutorials!