
14 Tips To Get Better Bokeh | Photoshop Actions
14 Tips to Get Better, More Beautiful Bokeh – by Paint the Moon Photoshop Actions
I am often asked about how a subject appears to almost pop off the background of a photo. The images have that beautiful, creamy, smooth bokeh. Bokeh is a photographic term derived from the Japanese “boke” – which means “blur” or “haze”). There is some debate over what the definition is and what “good bokeh” really consists of, but in most basic terms it is the pleasing quality of the out-of-focus areas in a photo (most notably the background, but can also be the foreground).
It can be the difference between a ho-hum photo and one where the subject almost seems 3D. The subjects seem to be practically jumping off a velvety, creamy background and make viewers feel they could just reach out and touch them. But how do you achieve that beautiful, creamy bokeh?

You can see the bokeh in both the background and the foreground of this image shot with a Canon 100mm 2.8 macro lens at ISO 320, f2.8, 1/100 second.
Of course, editing and Photoshop Actions can help enhance bokeh – from painting on light and color, adding dimension and drama, to actually intensifying the amount of blur in your background. Post processing is a vital step in achieving that professional, beautifully finished photo. But we before we get to that final step with editing you’ll want to shoot with intention to capture that artistic look you are after. The following tips will help you create the important foundation for that dreamy, artistic look.
Increase the quality of your bokeh with four main factors (scroll for the remaining tips and example images):
SHOOT WIDE OPEN
Use a wide aperture (a low f-stop number; f/2 or lower). I most often shoot at f/1.4 or f/1.2 for portraits with one subject. This will need to increase for groups of more than one subject (see notes below for groups and keeping them in focus).
KEEP ‘EM SEPARATED
Keep as much distance between the background and the subject as possible. The farther they are away from the background, the more blur and the more they will “pop” off of the background.
GO LONG
Use a longer focal length lens. You’ll see more extreme bokeh with a 135mm lens than you would a 35mm focal length because of the decreased depth of field.
GET UP CLOSE AND PERSONAL
Isolate your subject more by moving closer. Standing physically closer to your subject, or zooming in, will also increase your bokeh and make your subject pop off the background more.
Before we get to the rest of the tips, here’s a little cheat sheet of the main tips above for you to Pin or Share on Facebook.

Below are the remaining tips and important things to keep in mind.
FOCUS POINT
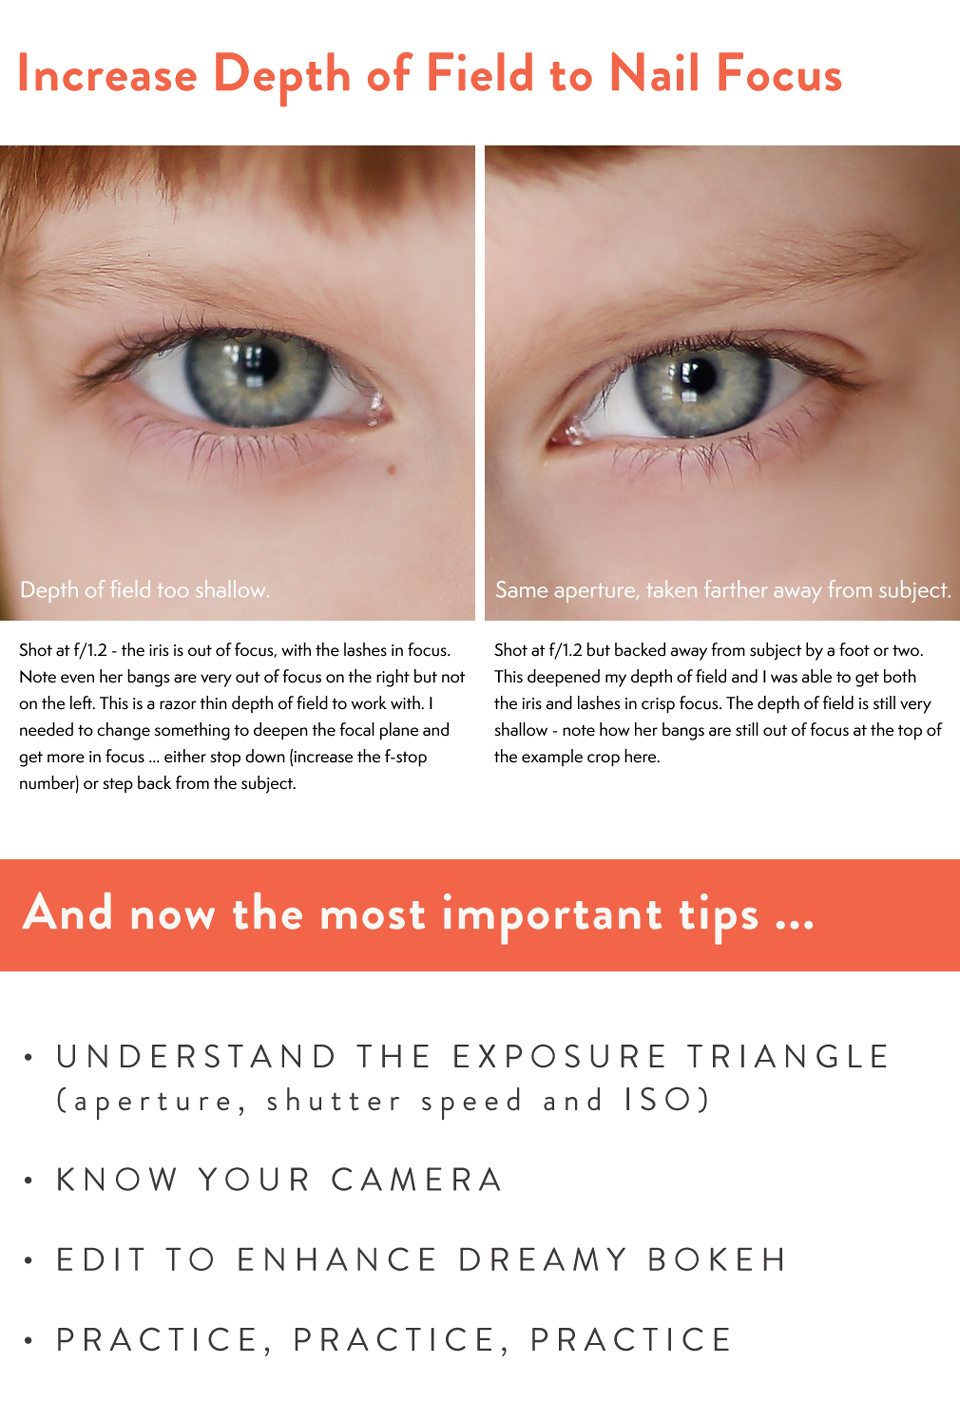
Choose your own focal point and watch to be sure you are getting your subject in focus since shooting wide open leaves you with a very narrow depth of field and can be a challenge to nail focus. Start practicing with a higher f-stop and work your way down. Your photo will be much better off with a deeper depth of field and less bokeh versus an out of focus subject. Pay attention to focus! Even beautiful bokeh won’t compensate for an out of focus subject.
FOCUSING DISTANCE
When shooting close to your subject don’t get closer than the minimum focusing distance for your lens or it won’t be able to focus properly (check your manual or Google it if you aren’t sure).
PRIME LENSES
Prime lenses work best for creating beautiful bokeh. Zooms can do a lovely job as well, but there are of a number of reasons primes will give you the best results – most importantly, because they are faster (able to shoot at wide apertures) primes will give you the best results. My exception to this point is the Canon 70-200mm f2.8L lens. It is the only zoom lens I own and I shoot it almost exclusively at 200mm and f2.8 because it’s the look and feel I prefer in my work (I think I’ve only adjusted that zoom barrel and shot at a shorter focal length once).
BUDGET BOKEH
The 50mm 1.4 lens is a great one for those on a budget or just starting out. For an even less expensive option the 50mm 1.8 is a good choice. Both Nikon and Canon have wonderful versions of the 50mm lenses. Another option is the Sigma 85mm f/1.4 DG HSM Art Lens or the Sigma 50mm F1.4 ART DG HSM Lens – the Sigma lenses are available for both Canon or Nikon. Another good choice for a longer focal length option is the Nikon 80-200mm f/2.8 lens (shot at 200mm).
FAVORITE LENSES
My personal favorite lenses for their amazing bokeh and background compression are the Nikon 105mm f/1.4 (my newest favorite), Nikon 85mm f/1.4G, Nikon 135mm f/2, Canon 85mm f/1.2 L, Canon 70-200mm f2.8 L (when shot at 200mm) and the Nikon 200mm f2 (get ready for sticker shock – this lens is spendy $$$$). A good way to “play” with one of the expensive lenses is to rent it for a few days and see what you think – either as a test to see if it’s worth it for your budget and needs, or to simply play with an incredible lens for a special session or event. Try BorrowLenses or Aperturent. 🙂
AGAIN WITH THE FOCUS
Nail your focus. The contrast of crisp, clear in focus areas against a blurred background (for portraits, this would be the eyes) creates even more drama and beauty – at least from this bokeh lover’s perspective anyway! They complement each other – nailing the focus will make the out of focus parts of the image in the background look even more creamy, while all that smooth, dreamy bokeh will make those sharp, super clear eyes seem to have even more clarity.
SHOOTING GROUPS
If shooting more than one subject set them on the same focal plane as much as possible and have them touching in some way. This can be their cheeks, shoulders, heads, etc. and then focus on the point where they are touching when shooting. For beginners, a good guide when adding more than one subject is to increase your f-stop number to equal the number of subjects in order to keep everyone in focus and to focus on the person closet to the camera. After f3.5 or f4, this should be sufficient with most groups and you can stop increasing. Focus on the person closest to the camera and try to keep them on the same general focal plane.
BACKGROUND/LOCATION QUALITY
The tones and light of your background, as well as the lens you use, will impact the quality of your bokeh. For instance, the light areas will appear as soft circular light patterns when there are points of light in the out of focus areas. A darker background with no points of light will result in bokeh with tones that just fade into each other – creamy, smooth. To experiment with how light can effect your bokeh, try setting your lens to manual focus, purposely “de-focus” and shoot an area with points of light (glitter or water droplets with light reflecting off them work beautifully). Do the same with a deeper background with more even lighting and notice the difference in the results.
THE RIGHT LIGHT
Ideal lighting (that often talked about Golden Hour) is an important part of achieving pleasing background bokeh. Try to assure that your subject is the brightest part of your image and avoid blown highlights in the background (too bright with no detail left). Too many bright spots surrounding your subject will detract from the star(s) of the photo. Also, the more simple your background is, the more of that buttery bokeh you’ll see without hard edges.
PERFECTING BOKEH WITH EDITING
Achieving perfect bokeh adds an amazing element and dimension that can make your subject and the image standout. Editing and using Paint the Moon Photoshop Actions can take your image to a final professional, finished style with loads of your personal style infused.
Enhance With Depth and Lush Pop – One of my go-to methods to enhance my backgrounds is to deepen the image surrounding my subject. I use the Paint on Depth and Lush Background actions from Reverie Collection frequently for making my subject pop. Giving more depth to the background and the area surrounding your subject really helps with that “pop off the image” look – it can give an image a whole other level of polish.
Add Color Pops and Toning for a Painterly Finish – Adding pops of color to the background with Grace Collection’s Background Color Palette actions is a great way to add interest and drama.
Create Softness and Blur – For actually adding blur the actions Rich Deep Bokeh (a deep, velvet blur) and Soft Bokeh (a light, airy softness) from Reverie Collection are other favorite ways to make your subject the star and beautify your backgrounds.
Create dynamic lighting – And, finally, my other favorite way to edit my backgrounds and bokeh is to use a light action or light overlay. Light overlays in the form of sun glows, sun rays, halos, and other beautiful natural light effects can be found in the Reverie Collection, while sun glow actions and light brushes are found in the Grace Collection.
And just for fun, here are some examples showing different lenses and settings, so you can see how different bokeh can appear with different settings, lenses, distances, backgrounds, lighting, etc.

Shot with a Nikon 135mm f/2 lens at f/2.0.
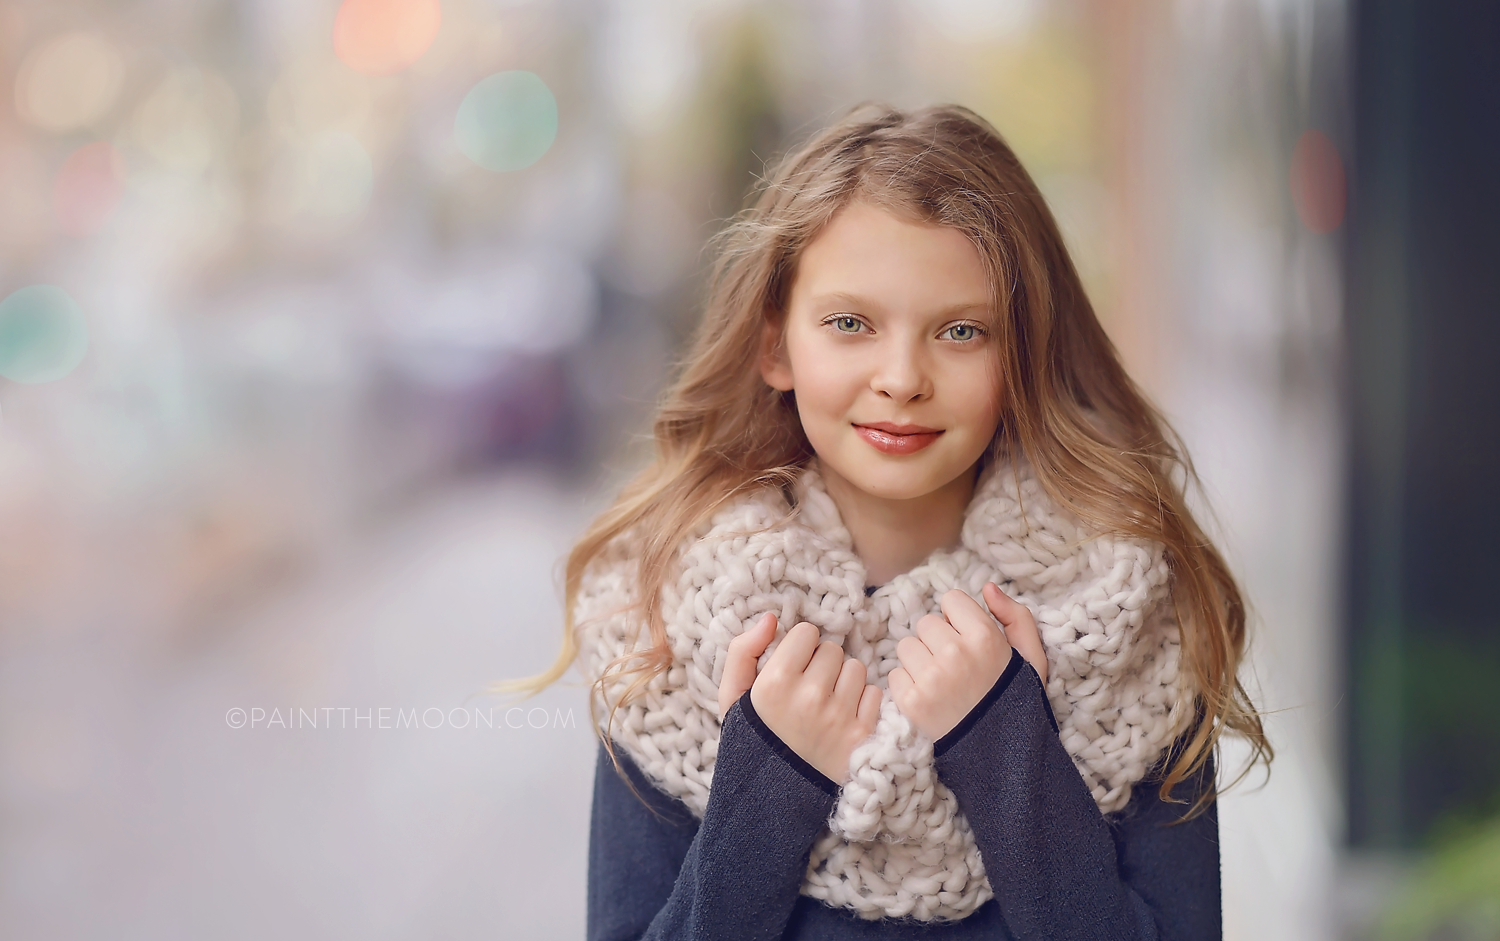
Shot with a Nikon 105mm f/1.4 lens at f/1.4. This was just a quick shot while standing outside of a building downtown. Big city bokeh can be so pretty! The lovely city bokeh was enhanced with the Background Paint Palette from Reverie Collection.

This image was taken with a Canon 70-200mm f2.8 L lens and shot at 200mm and f2.8. I enhanced the background blur that was already there with actions from the Grace Collection (specifically Background Color Palettes to create some dimension, detail and softness in the background which was pretty lifeless in the middle of our rainy Oregon winter). I finished up the edit with another action that enhances background blur/creaminess. The Velveteen Photoshop action is one of my favorites for creating velvety softness (from the Luminosity Collection) – the Reverie Collection also has a similar look but with a much richer, velvet finish called Rich Satin Finish – it can help to unify the look of the entire image, giving everything a cohesive velvety feel. A golden light glow was placed in the center above the foxy little subject and adds a bit of sunshiny light and spotlights our star subject.

Shot with a Nikon 135mm f/2 lens at f/2. Note how the foreground and the background is very out of focus. I was laying in the grass on my tummy for this shot, allowing for both the grass in front of her and the grass and flowers behind her to be out of my depth of field.
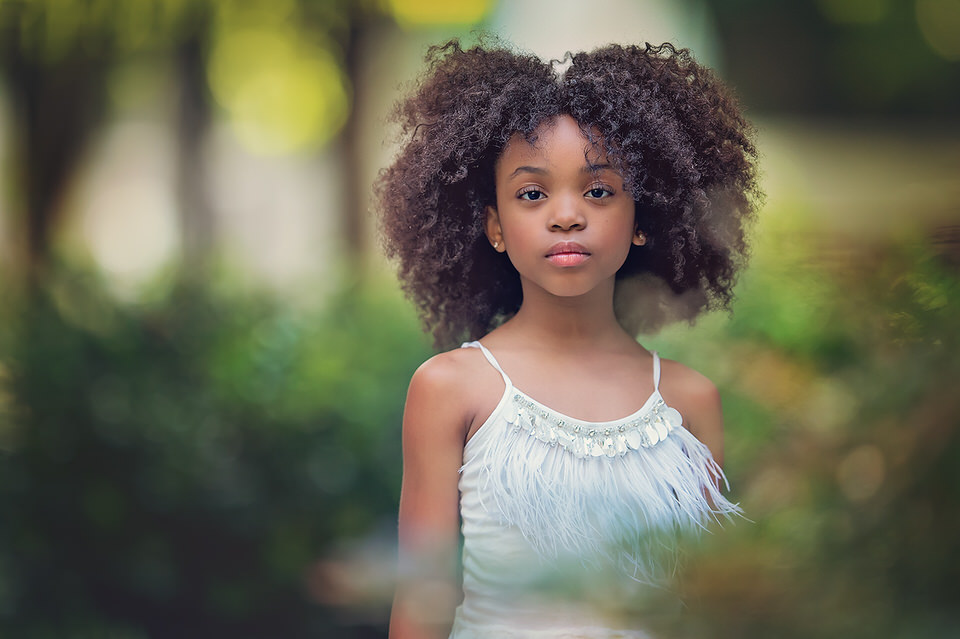
Another wonderful way to frame your subject is to shoot through grass, shrubs or flowers, etc. so that they are seen as a soft, artistic frame for your subject.
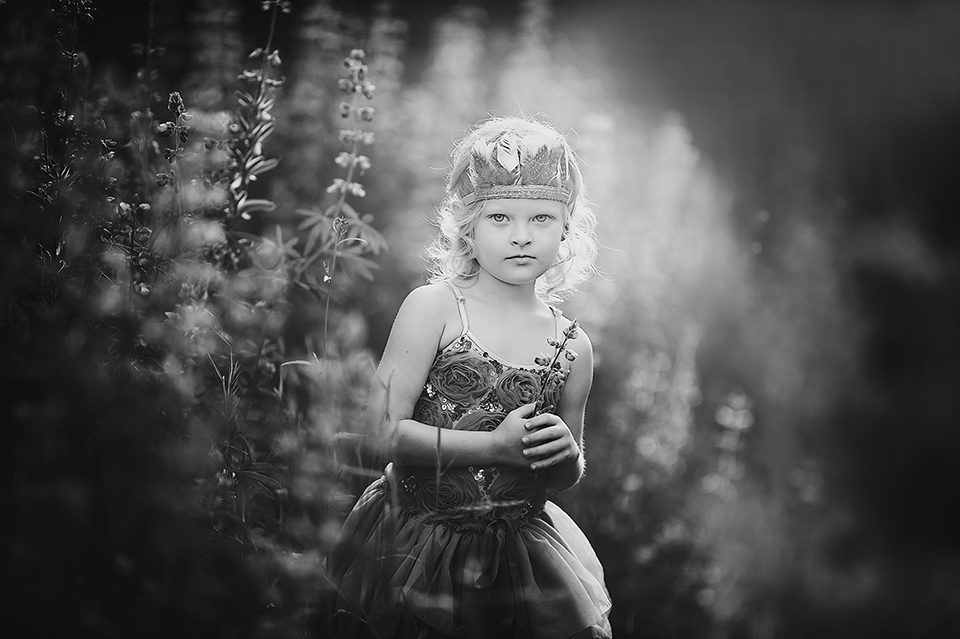
In this black and white you’ll notice the combination of low light in the sky behind her and all those flowers she’s standing in complement each other well. The sunshine lighting up the background blur of the flowers looks mysterious and ethereal. Without that shallow depth of field and resulting bokeh, this image would have a totally different feeling.

Shot with a Nikon 85mm f/1.4G lens at f/1.4. We just threw up a cheap background stand outside in a driveway and draped an inexpensive quilt over it. I pulled the subject off the backdrop by about 10 feet, and got as close as I could to her to shoot. The results are a colorful, unique backdrop that adds a bit of whimsy.
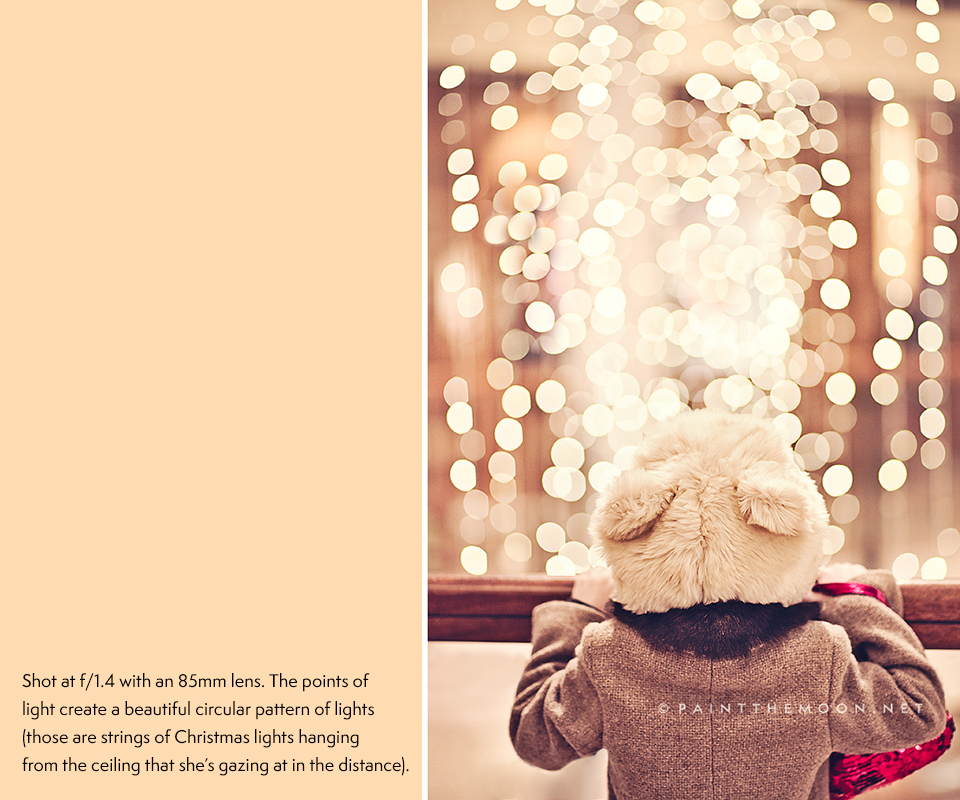
Shot with a Nikon 85mm f/1.4G lens at f/1.4.
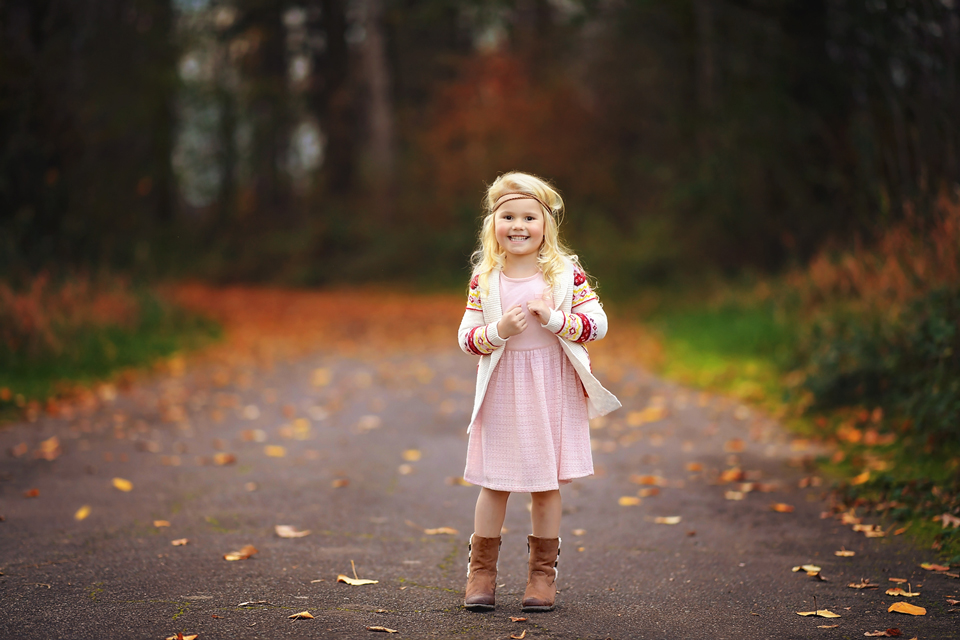
Shot with a Nikon 105mm f/1.4 lens at f/1.4. The pathway behind this cutie was in the shadows of the woods, and she was standing in a nice open area with plenty of light to spotlight her so the background bokeh helps her stand out more dramatically. Reverie Photoshop Actions helped to create an even more dynamic, eye-catching look (you can find the before and after on the product page). With editing, I deepened the background by quite a bit and enhanced the fall colors to give a lot more drama and rich color (with Reverie Collection).

Shot with a Nikon 135mm f/2 lens at f/2.0. Pathways rock for framing your subject and achieving amazing subject popping bokeh. The path moving into the distance will give you separation from your subject and background, paths provide great leading lines and tend to frame subjects nicely with their symmetry in most cases.
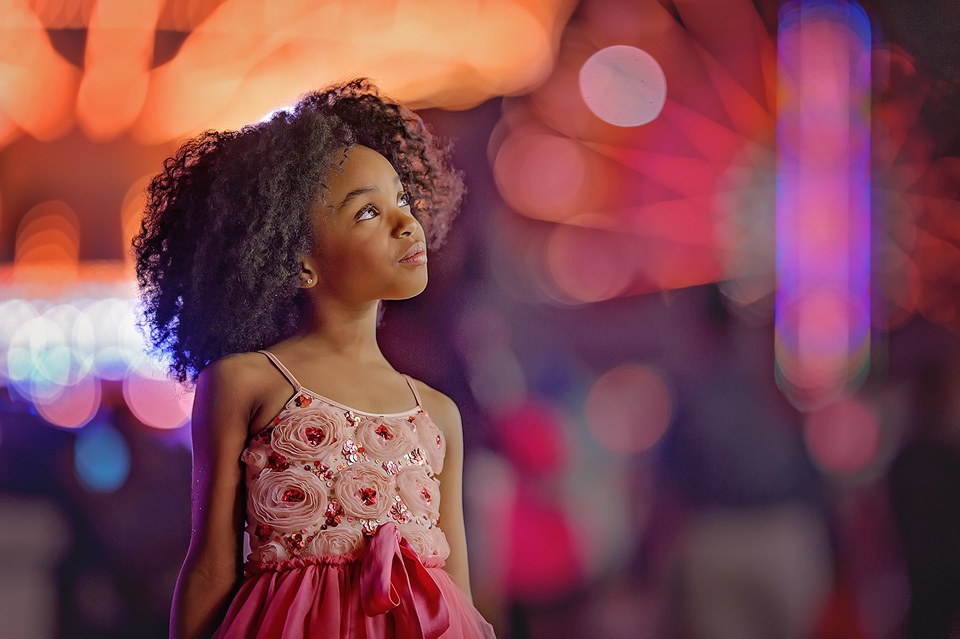
Shot with a Nikon 135mm f/2 lens at f/2.0. Pretty bokeh and the right editing can even transform a dirty amusement park into a magical background!
I hope some of these tips are helpful to you!
Save
Tags: Aperture, Background Blur, Blur, Blurring, bokeh, Focus, Grace Collection, Lenses, Processing Blur, Reverie Collection
