Photoshop Actions Tutorial Recipe | Spring Colors and a Fresh Look, Step by Step | Paint the Moon

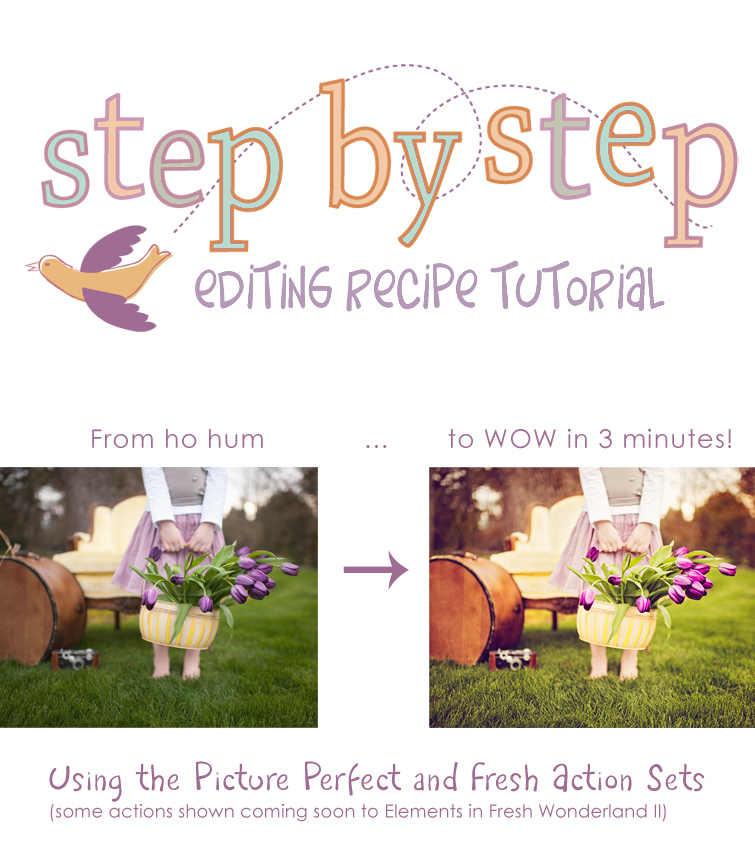
Today’s Step by Step uses the sets, Picture Perfectand Fresh (a few of the actions are in Fresh Wonderland … the others are coming to PSE as Fresh Wonderland II within the next week or two). This particular processing session took me about 3 minutes to complete (including a quick cloning job to remove the distracting raffia on the suitcase).
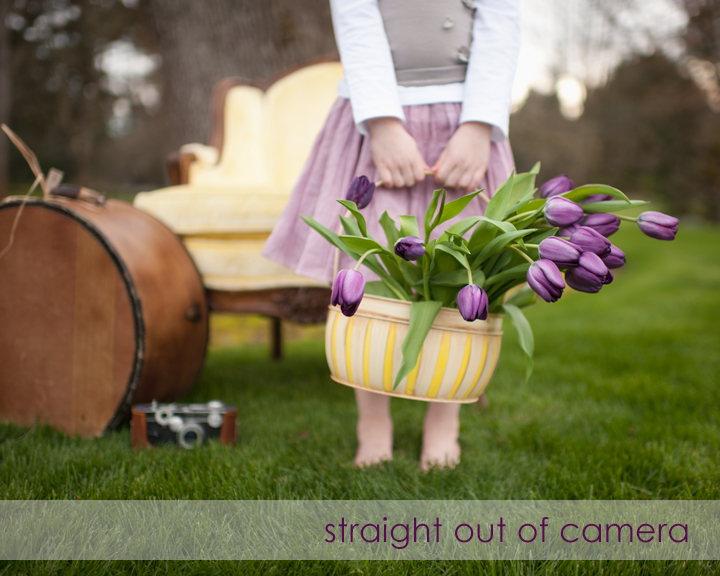
This image was taken right around sunset, and you can just see a hint of the golden color peeking over the trees in the back. I wanted to bring out some fresh, golden colors and enhance the overall spring-y, happy mood of the photo. The perfect set to do this is the Fresh action set. For Elements users looking for Zippy Soft Pop (and the very popular Pop My Flare! and faux sun flare actions), be sure to look out for Fresh Wonderland II, releasing in the next couple weeks. I also use a couple tools from the Picture Perfect Mega Set.
I start with the whimsical Candy Light Pop action from Fresh (can be found in Fresh Wonderland for PSE). This action gives you a fresh and whimsical color and pop. I don’t need to do a thing to it except adjust the opacity down to about 55%.
Also from the Fresh set (and coming to Fresh Wonderland II for PSE), I use the Zippy Soft Pop action to add a little more drama to the image. This makes my highlights almost blown out, so I turn off the Make It Lighter layer and the Brighten & Contrast layer. Then I turn on the Make It Darker layer and raise the opacity to 10%.
Action tip: Note that most of the PTM artistic actions include a Make It Darker and Make It Lighter layer to help adjust your exposure as needed. Most of the time the Make It Lighter layer is turned on at the end of the action, with the Make It Darker layer having an opacity set at 0%. If an action makes your image too bright, simply turn off the Make It Lighter layer (or adjust the opacity down) … and if still too bright, turn up the opacity on the Make It Darker layer until you see the results you like.
Next I run the Let’s Be Clear action from Picture Perfect to bring out edge details. The opacity is turned up to 33%. To brighten up the shadows which have gotten a little muddy with the contrast added I run Instant Reflector at 25% from Picture Perfect. And also from the Picture Perfect set I run Bring Back Highlights to fill back in some details in the chair and her shirt sleeves, turning the opacity to 20%.
Finally, to add just a little soft sweetness I run Sweet Prairie from Picture Perfect. I love this action for bringing a hint of vintage and sunshine to an image. I turn the opacity down to 40% to just leave a little hint of honeyed warmth and strawberry sunset haze. Yummy!
And that’s it … here are the before and after images:


Tags: elements actions, free actions, Photoshop Actions, photoshop tutorials, PSE Actions, sun flare

Thank you so much!! I uploaded the sample from Simply Canvas and I LOVE YOUR ACTIONS!!! Can’t wait to purchase more!!
I’m so happy you are enjoying them! 🙂
ooo that would look nice on some of my doll photos 🙂
Wow… I have purchased some of your actions and they are FANTASTIC. That image above witht he purple tulips right out of the camera is amazing as is. Do you set a custom WB or o you prefer to shoot with auto, shady, etc?