Newborn Baby Step by Step Action Processing Recipe | Photoshop Actions Tutorial Retouching

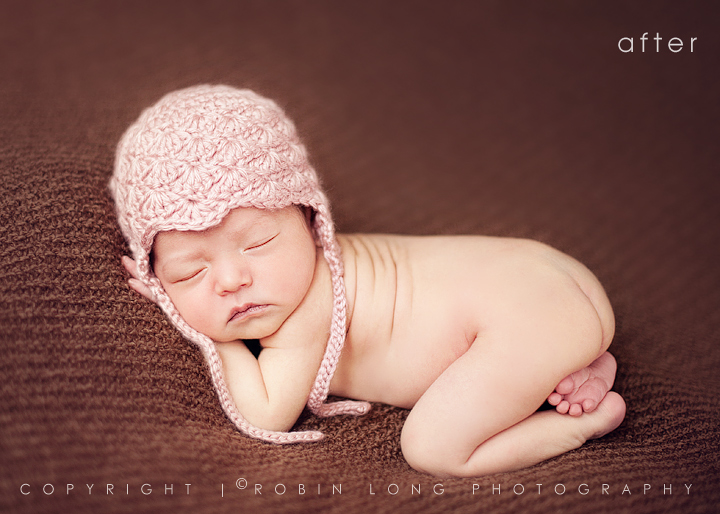
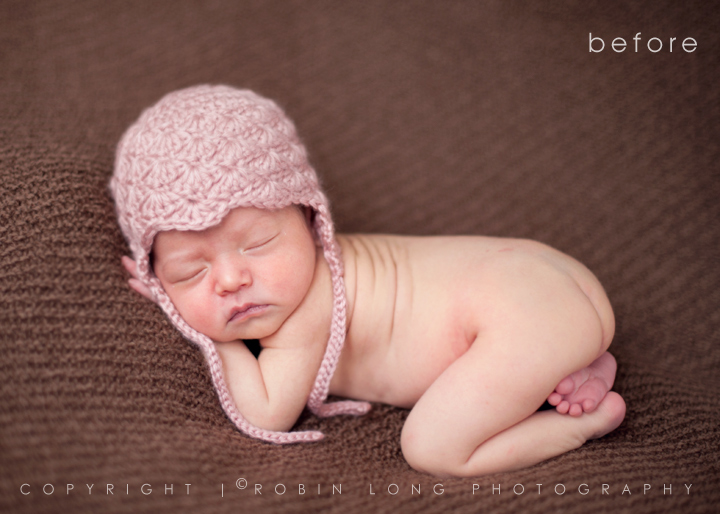
I’ve been asked frequently about what my workflow for babies is, so I thought I’d share a step by step with you on this lovely image by my dear friend, Robin Long. I’ll be using only actions from the new mega set, Picture Perfect, from start to finish. This particular edit took me about 4 minutes to complete. Once you have gotten to know your actions and find what works best for you it’s easy to speed through edits in no time at all. This set has all the actions you need to achieve that creamy, dreamy and pure skin in baby portraits that we all love.
I like to start out my processing by brightening up the image if it’s needed. I run the Creamy Skin Brightener to give it a little brightness and added creaminess to the skin. I leave it at 100% and select the Extra Warm Lightening and mask off the skin areas since this little girl is nice and warm already, which comes with great custom white balancing in camera.
Next, I’m going to tone down a common problem in newborns, the red blotchies. 🙂 The Banish the Red Blotchies was created with just this purpose in mind, although it’s also wonderful for removing red areas in skin from all types of portraits. I leave this at 70% and mask only her face and around the red spots on her body in order to keep from desaturating the blanket. If there were any color casts needing to be fixed I would do my color corrections here using the “Banish” color correctors in Picture Perfect or the different color correctors in Miracle Makeover (also available for PSE). I usually leave babies a little pinker than most subjects because they are naturally so, especially in their little precious faces. I would also make those eyes pop if needed if we had open eyes in an older baby using Miracle Makeover’s Sparkle Eyes action.
To get that beautiful, pure and naturally smooth skin I next run the Creamy and Smooth Skin action and paint over her body and face, leaving the opacity at 55%.
She has a little shiny spot on her nose that I quickly dab at using Baby Powder at 45%.
To create an even more dramatic drop off in focus I run the Selective Focus (Faux Shallow DOF Blur) action. After running I simply mask back the areas I wish to keep in sharp focus (all of baby girl and at a 50% opacity the blanket in front of her).
For a crisp and clean look I run Let’s Be Clear (Lighter Clarity) at 25%.
I love to create a little drama with hand painted vignettes using the Paint With Light action. I just use the Paint Darkness layer and paint with a giant, soft brush around the edges and background of the image at 35%. It creates a spotlight on baby without looking too much like a standard vignette you can see a mile away.
I finish up with the beautiful artistic action Velvet Retro at a low opacity of 40% and then run Sharpen Perfection.
There you have it … Picture Perfect in less than five minutes. 🙂


Tags: newborn, newborn photographer, paint the moon, Photoshop Actions, Photoshop Actions for Photographers, photoshop tips, photoshop tricks, photoshop tutorials, retouching, skin

LOVE your work! Your actions and tools are amazing!
I can’t seem to get the blotchy and the soften actions to work correctly. I select them and do i take the Fuzziness level all the way to the right? It doesnt go that much detail.
Feel free to email me at [email protected] for help, Ryan! 🙂
Will these actions look similar with jpeg files using photoshop elements? I love your actions and your photos!!!!
Thanks,
JoLynn
Yes! 🙂 And thank you. 🙂