Creating a Composite Image (combining multiple photos to create magic)

We’ve all seen the images that have some people scratching their heads wondering, “How on earth did the photographer do that? … Lucky break, amazing Jedi skills or fabulous Photoshop job?” The newborns hanging from a tree branch (never attempt these types of poses with babies without absolutely knowing what you are doing and ensuring baby’s safety) … the little kid being thrown 15 feet in the air by daddy … the family group shot of 20 people who all amazingly have eyes open, smiles on their faces and looking right at the camera. Many times what you’re seeing isn’t in fact magic or unbelievable talent behind the camera, but some good planning and a little Photoshop work with layer masks.
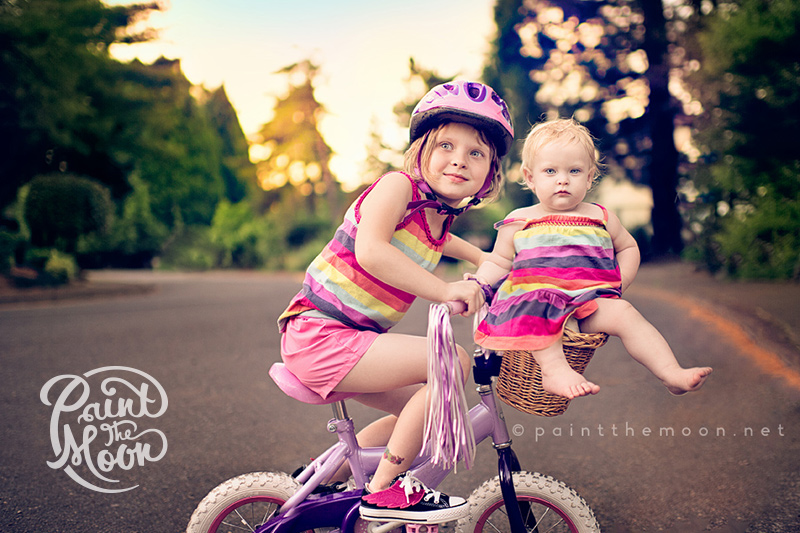
For the image in the example today I did it quick and dirty style, as it was my little girl’s idea to have her baby sister riding in the basket and not a serious client photo. So, when she asked for me to take a shot with Eliza June sitting in her basket, I hand held the camera (tripod is recommended for a “serious” job) and quickly took four different shots to combine in Photoshop later. My husband safely held baby while she was sitting in the basket – that was my first shot. Then I had Adeline look towards me (easier said than done, so I take whatever I can get) – which was my second shot. Then I needed a clean background without my husband in it, so he held the baby and I took another shot of the scene without him or Eliza in it and finally I needed a shot with Eliza’s dress completely showing and no hand covering/bunching it up. Ideally, I would have had her legs in the same positions for both shots, since the dress is falling much differently in the second photo where I was going to take the dress from. However, this was a for fun shot for my daughter and getting Eliza to be cool with sitting in the basket for more than a couple seconds was no easy task. 🙂
Here are a few tips for actually taking the images to help make your job easier when you get to Photoshop and start combining them:
- Have your settings on manual so you don’t have varying exposures/aperture/etc between the images you’ll be combining.
- Often times it’s easier to combine images when the background surrounding your subject(s) is busy. For instance, a grassy field will be easier versus a brick wall, since your masking skills won’t be as obvious if you happen to not get it spot on when painting on the layer mask.
- Pre-focus your shot and then set it to manual focus so each shot has the same focus point and your camera isn’t hunting for the spot to focus on each frame. This is also important so you don’t place someone into your composite that is perfectly sharp and have the grass they are standing in out of focus – they won’t match and your compositing work will be obvious – and oh so tacky.
A side note … Placing subjects into all new environments, is rarely a great idea (in my opinion). It can be done well using a green screen, perfectly matched lighting/white balance/etc. and a good heaping of Photoshop prowess and time – however, I would say creating composite images is best used to create that perfect image that was just out of your reach for whatever reason (keeping a newborn hanging in fabric safe, getting all five kids with their eyes open at once, etc).

Once in Photoshop I open the four images I am combining and layer them in Photoshop as they appear below. I create a layer mask for each layer, making the top two black (which hides everything – remember when working with layer masks, white reveals and black conceals – a layer masks basics video tutorial is coming very soon for those who need help) and the bottom two layers white (so everything shows except where I paint with black). You’ll notice that I painted with black on the Eliza layer so that my husband is hidden and the clear street image on the very bottom shows through. For the top two layers I only paint with white over Adeline and over Eliza’s dress. For Eliza’s dress I had to rotate and resize just a little bit to make it fit just right since she was in a little bit different position for each image. To make this easier to do I lower the opacity on the dress layer to 50% while I’m doing the resize and moving the layer into place … that way you can match it up exactly to the layer underneath. You can see in the thumbnail of that layer how that entire layer was shifted a little. Once I have everything painted and placed exactly where I want (zooming way in when painting on your layer masks is recommended), I flatten the image and continue on to process it.


This is the final image after combining the images … now we just need to make it pretty, a la Paint the Moon actions.

![]()


Click to “Stumble Upon” us! 🙂 …
Super cute little wings on my daughter’s Converse are from this Etsy seller – Small Fly. Images taken with my 35mm 1.4G lens.

Thank you, thank you for this! I cannot count how many times I have needed this tutorial, especially with kiddos. You are the best. And it is refreshing to know that your daughter is not super hot on having photos taken of her, I know I have to take at least 50 to get one with her with a nice face or smile. Thanks Annie, you are so talented and it is so, so appreciated that you share that talent with us 🙂
Love it! I love your processing as well!! You rock girlfriend!
I wish I could have you come and stay with me for a week to teach me Photoshop. I still haven’t figured out the whole layer thing!! Makes me crazy! Time to take an actual class at the community college I guess. I want to be able to use some of the fabulous products you put out. 😀
First, you are AWESOME.. this is the first tutorial I have read that actually MAKES SENSE TO ME, which is no easy feat, plus it is PRETTY! LOL! Second, you are super talented, and I love checking out your stuff (that sounded less dirty in my head…) and third, where did you get the wings for Miss Adeline’s shoes? Those are FANTASTIC MUST HAVES for my girl! I believe she would wear ANY shoes with those lovely wings on them! I also might wear them, but that is a post for another day! You are great, keep em comin’!
Jules
Ha! So hilariously cute! Love it!
Annie, thanks so much for this! I was actually thinking of you today while feeding my 7 mo…remembering those pics you took of your Junebug eating something messy. Your actions are wonderful (I think I have most of them) and I love looking at your photos!!! Thanks for the inspiration!
Absolutely amazing! Beautiful pictures! I havent figured out the layer masking thing just yet, so will be looking forward to a tutorial! thanks so much for sharing! I LOVE your pictures!!!
omg you are a genius! i love the step by step and the final product is just gorgeous as usual! and ps. love Miss. A’s pouty look too, she’s such a doll! oxox
Annie that’s awesome!
Annie, you are amazing!! You are my absolute favorite photographer and photoshop action guru! Thank you again for making something that sounds so complicated, understandable for those of us still learning! Sending much luv and admiration your way!!
You’re so talented. But mostly, super generous and thoughtful for sharing your knowledge with all of us. It is greatly appreciated. Thanks, Annie!
Thanks for the great tutorial!! Awesome!!
Annie, thank you so much for this tutorial! I love your work! God bless!
Love this! Thank you for sharing 🙂
Very cool, masking is one thing I struggle with.
I like the pouty look at the end lol
Thanks for the great tutorial. Love the photos you share of your girls…they are adorable!
I love this Annie, thank you! I’m moving away from paid photo shoots and into more things just for fun with my family. I’m excited to try some interesting composites and see what happens. Thank you for the inspiration! I also love all the recipes- I have bought actions from different places over the last two years but I never used them much until discovering PTM. Now I use your actions all the time, and I think one of the reasons that I love them so much is because your tutorials are so good that I am getting better at getting the look I want with the action. Thank you!
This is exactly what I am after…fantastic site btw. However, I would love to know when the video of this tut comes out as I am hopeless and working out everything you mean. When do you think it will be available?
Oh my goodness, you’re brilliant!!!